


It has been raining in Switzerland for weeks, so why not learn something new and measure the humidity on an IOT device with the help of Microsoft IoT Central
How to do it
First of all you need an IoT device. Microsoft was so kind to bring up the MXChip IoT devkit which I ordered last week at Distrelect. And hey, it took only one day for the delivery to my house. So, let’s start the fun:
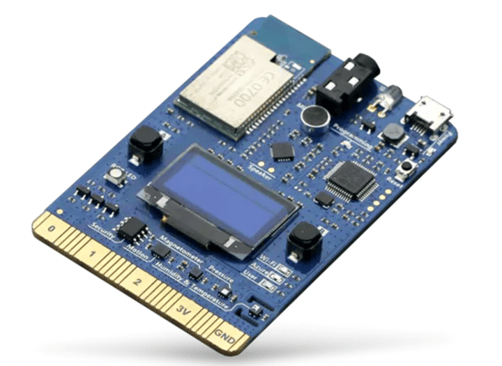
The MXChip is packed with many sensors and functionalities:
- Motion sensor
- Magnetometer sensor
- Atmospheric pressure sensor
- Temperature and humidity sensor
- Buttons that you can program
- A display
- A RGB Led
- And much more
The first step within my project was going to https://apps.azureiotcentral.com/ where all the magic will happen ;-)
Azure Central provides prebuilt templates which you can use as a quick start. Simply navigate to Device Templates and choose "New".
With the MX Chip you will select the associated template which looks as follows:
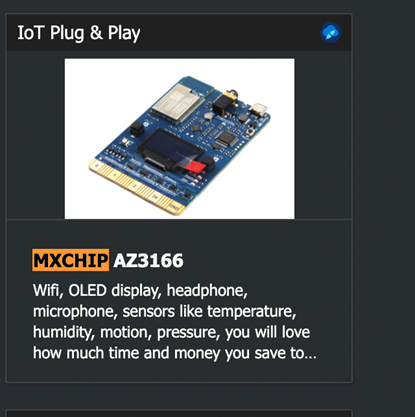
As you can see there are tons of prebuilt templates and IoT devices and even if you can't find a template for your own device, there is still a possibility to integrate your device natively into the IOT central.
After giving your device a name you will see all parameters that the device contains within the DCM (Device capability module). The DCM consists of an interface like:
- Telemetry data your device is measuring
- Commands to control your device
- General Properties
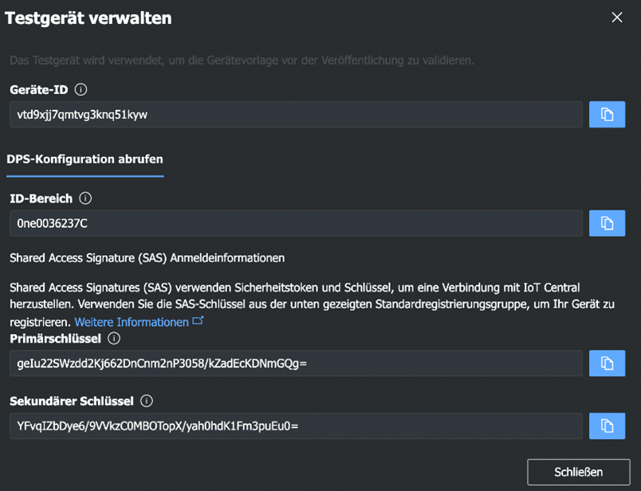
To connect your device to the cloud you need the following parameters, which are generated during the publishing process:
After publishing your device to the IoT Central, it's time to setup the MXChip itself.
Unpack the MXChip and plug it in to your computer.
First of all you need to update the firmware to the most recent version which currently is Version 2.1.2. The newest release can be found on GITHUB under https://github.com/Azure/iot-central-firmware/releases. Download it and save it on your computer.
Now drag and drop the file onto your device which should be visible within the explorer. The installation will start immediately, and the device will be rebooted right afterwards.
By pressing the B Button and the reset button in sequence and releasing those buttons in the opposite sequence, the device will show you its own WLAN SID. Something like AZ- …
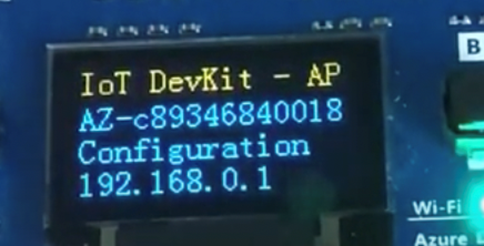
Now connect your computer to this WLAN and browse to the IP Address shown in the screen above.
If the screen will show you only the WLAN settings, then you need to do a hard reset by pressing A and B together for about 10 seconds and reset when asked.
After that your screen should the look like this:
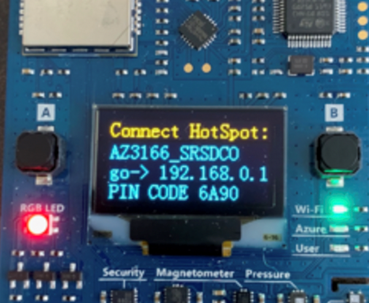
Now browse to the shown IP Address and configure your device with the parameters provided by IoT Central during its publishing process (the pin code from the device is shown on the MX Chip. In this case shown above, its "6A90".
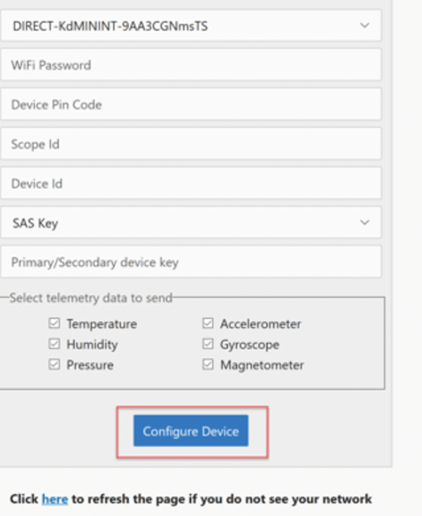
After pressing “configure device” it will start sending actual telemetry data over your WLAN to the IoT Central. These data can then be viewed on the dashboard of your device in cloud central.
The final result looks like this:
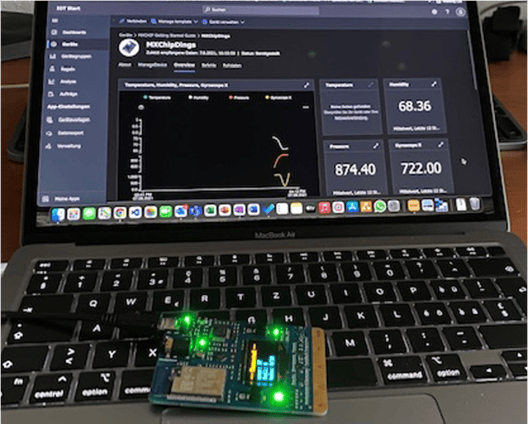
As you can see at the moment the humidity is 68% and it is still raining :-(
As next I would like to integrate the IoT device into a solution based on Power Apps and Power Automate, but this will be documented in another blogpost :-)
Cheers
Jörg
PS: If you have difficulties in setting up your device, I would be happy to help!
